Relay authentication
The Settings → Relay authentication tab — platform administrators only.
Relay authentication lets users sign in to the platform through an external identity provider (the company SSO, a third-party directory…): the platform's Keycloak then delegates authentication to that upstream provider, using OpenID Connect or SAML 2.0.
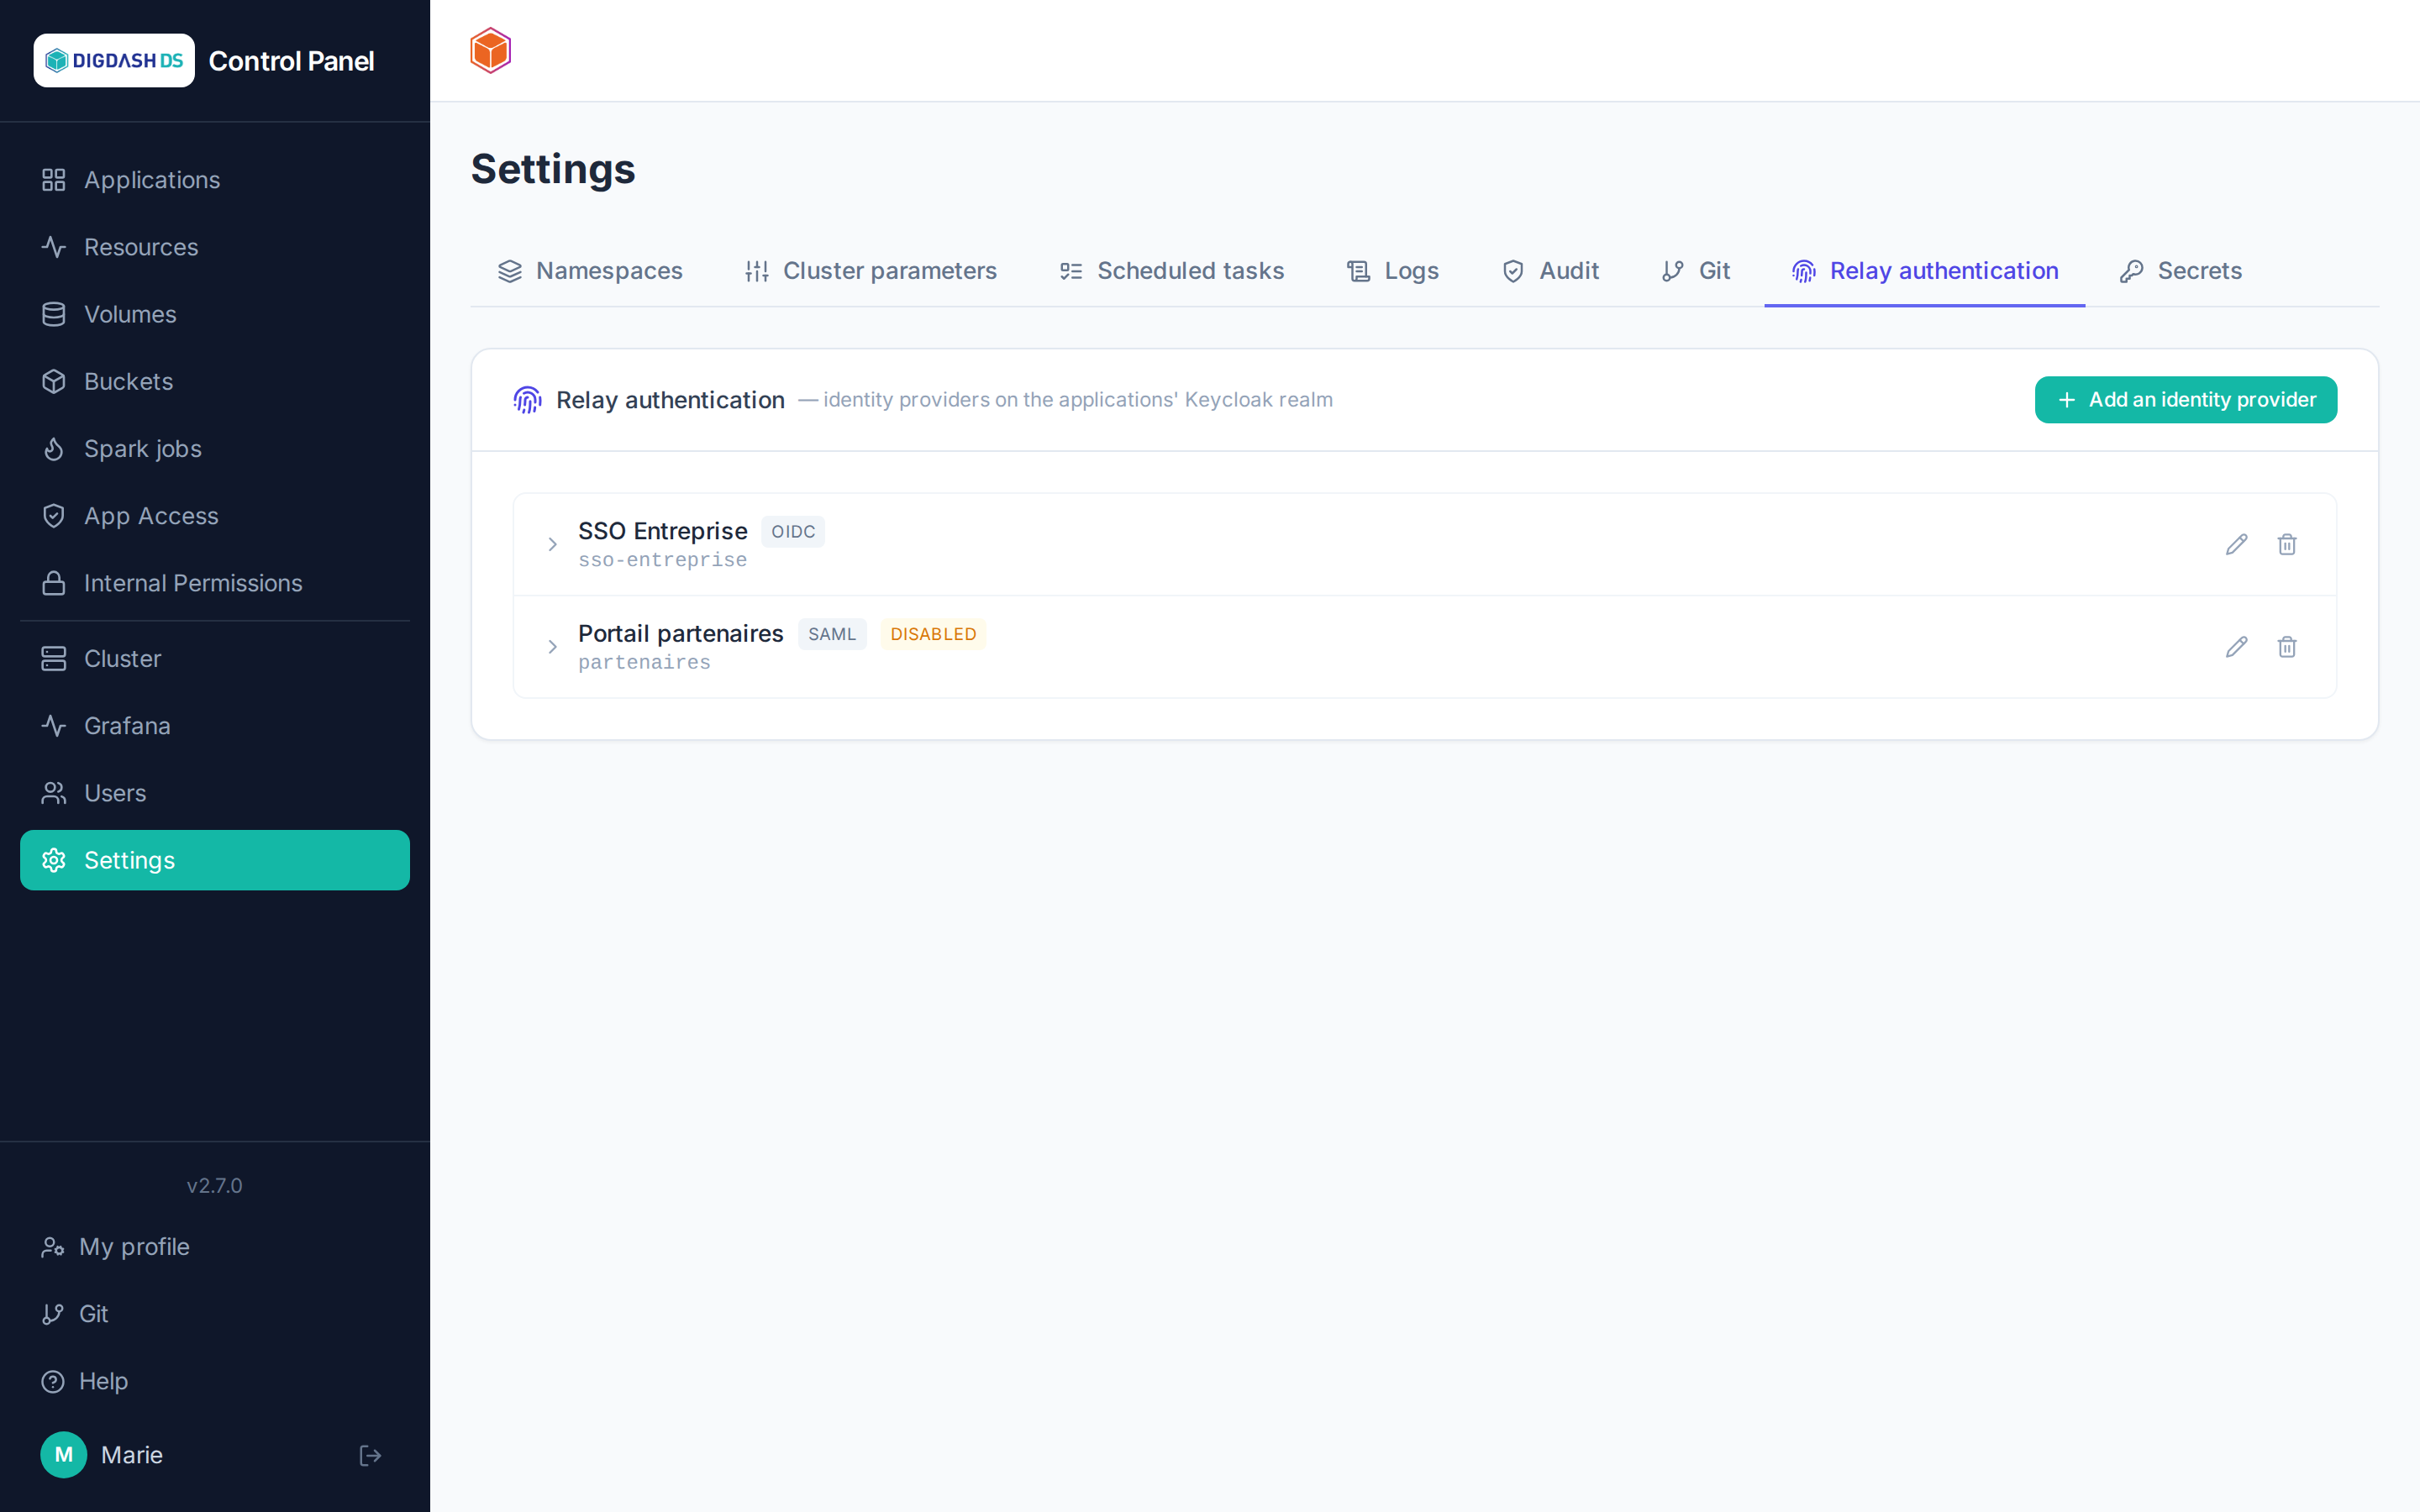
Adding an identity provider
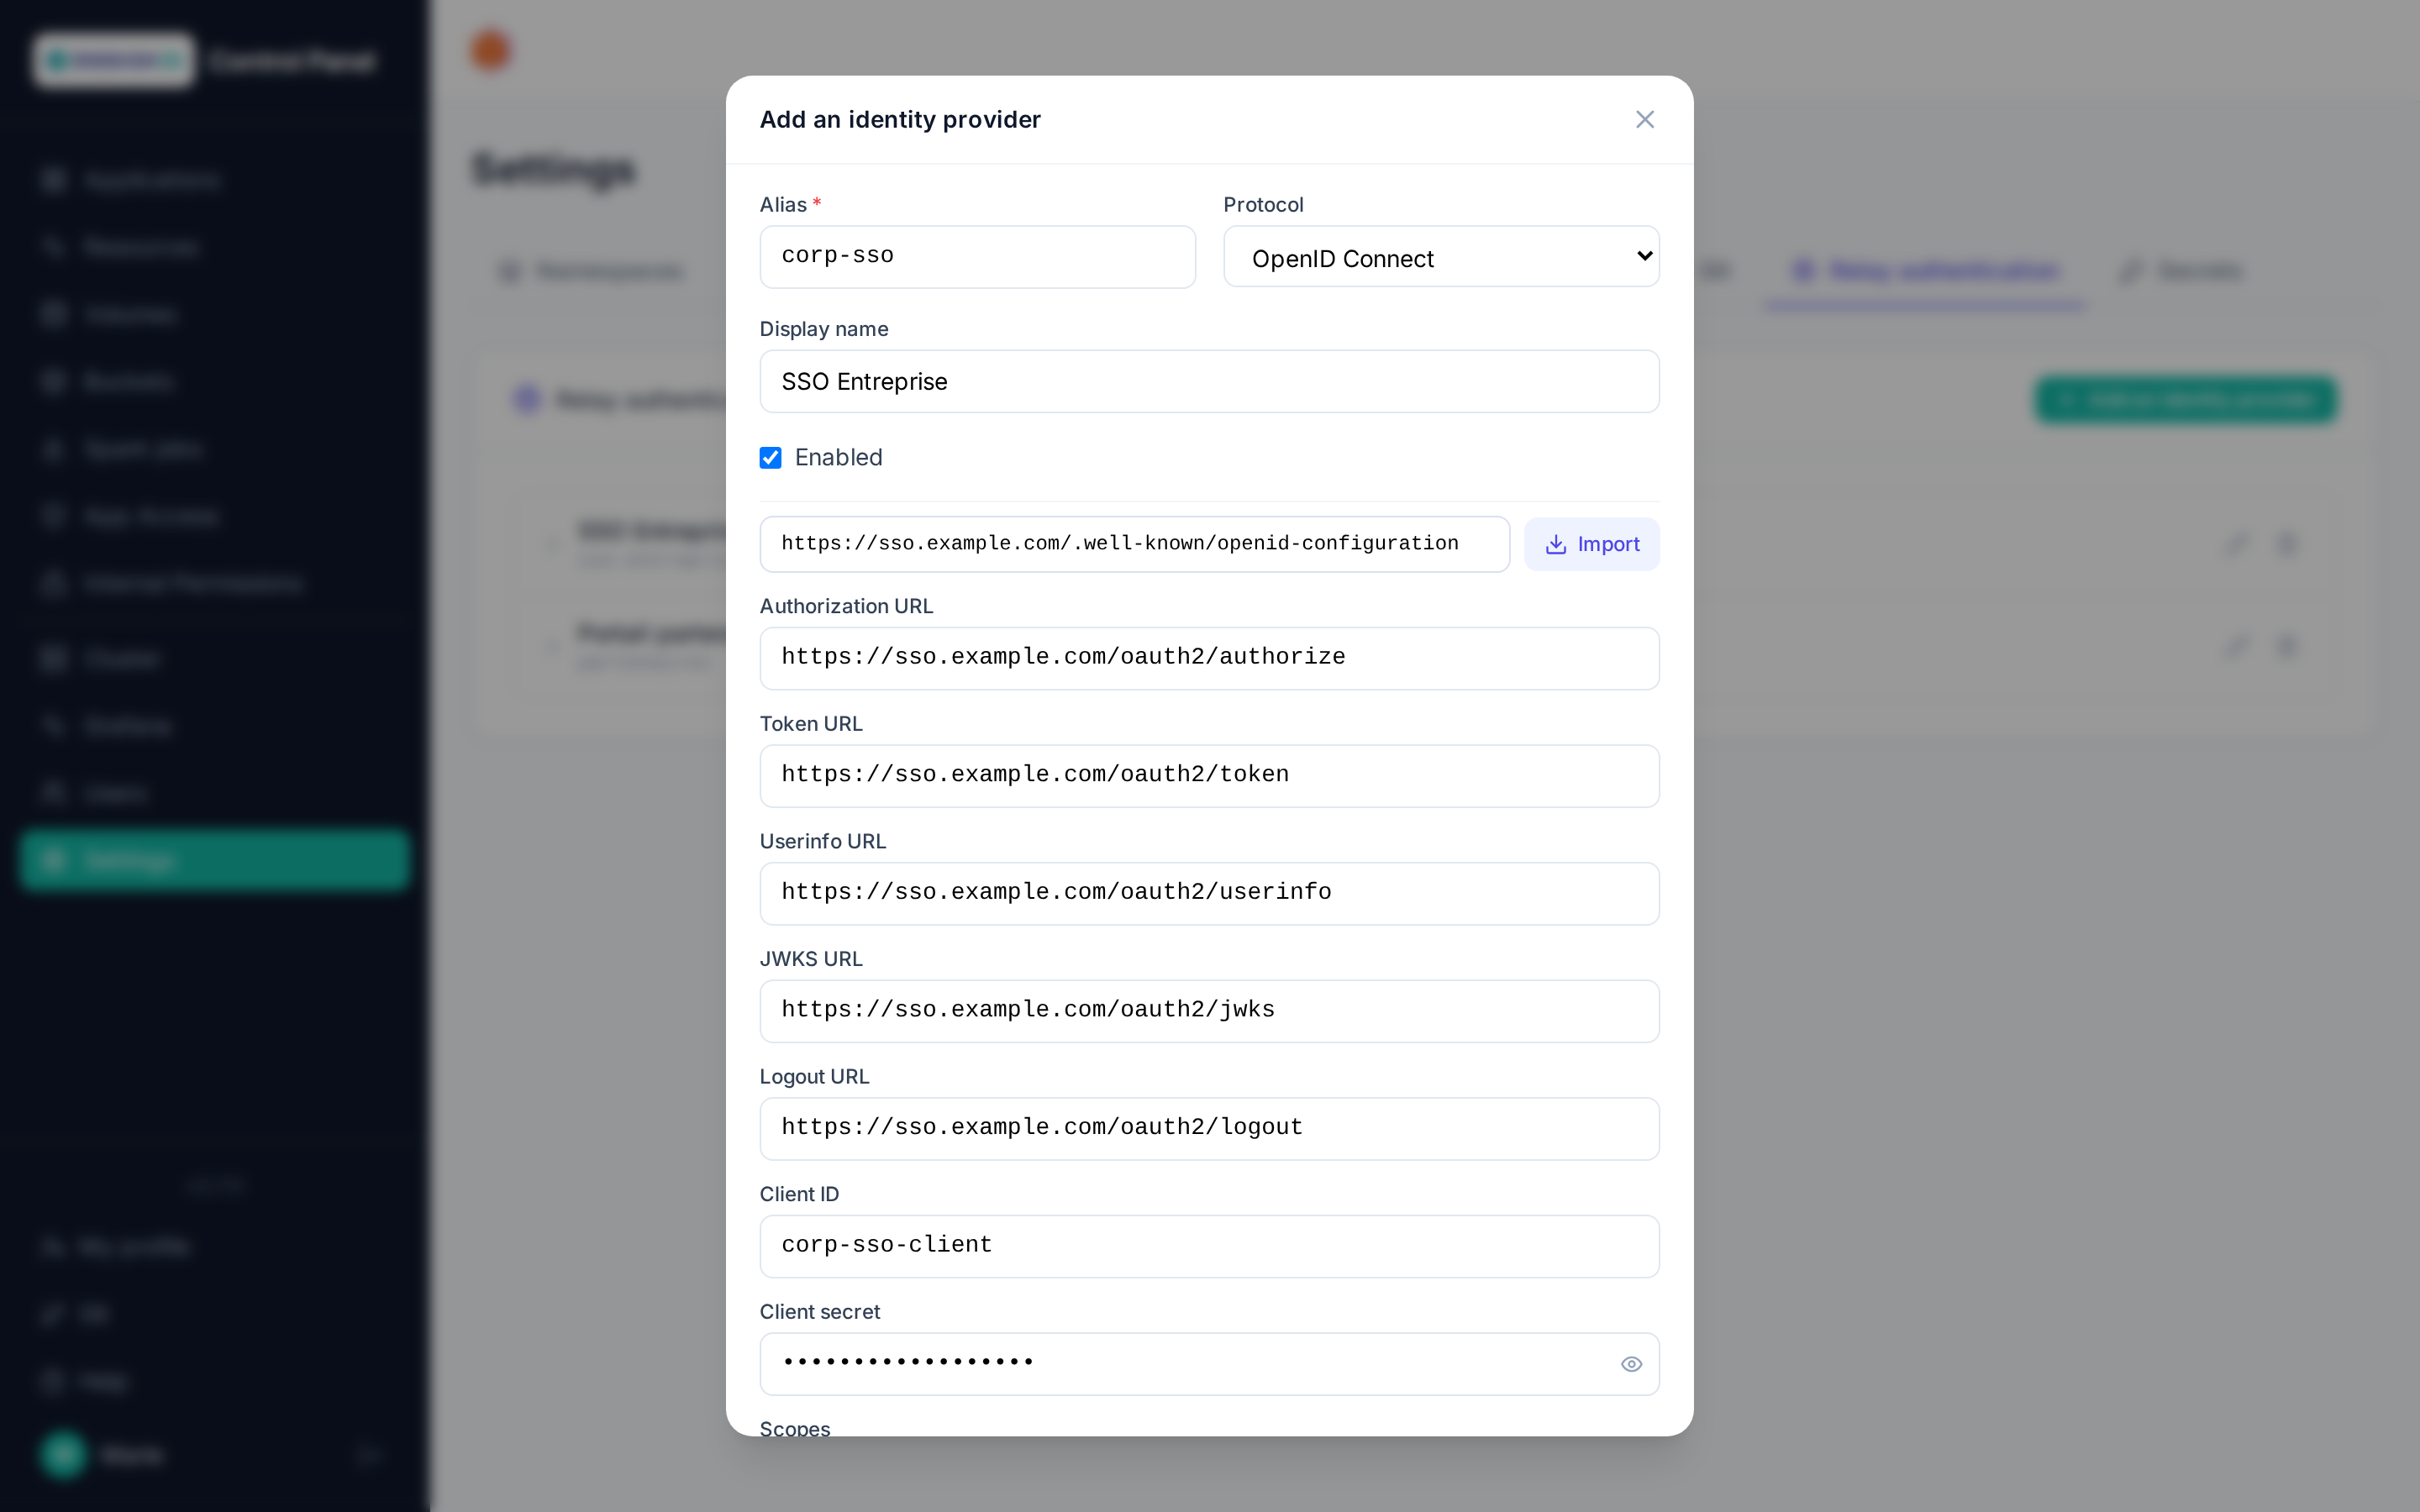
Add an identity provider:
- Alias: a unique technical identifier (it appears in URLs — cannot be changed afterwards).
- Protocol: OpenID Connect or SAML 2.0 — the form adapts accordingly.
- Display name: the label of the sign-in button shown to users.
- Import from a URL: paste the provider's discovery URL (
…/.well-known/openid-configurationfor OIDC, the metadata URL for SAML) and click Import — the authorization, token, JWKS URLs… are filled in automatically. - Fill in the Client ID and Client secret provided by the upstream provider's administrator, then Save.
The provider then appears in the list; it can be disabled temporarily, edited or deleted at any time. The configuration lives directly in Keycloak — there is no local copy, what you see is always the real state.
Mappers
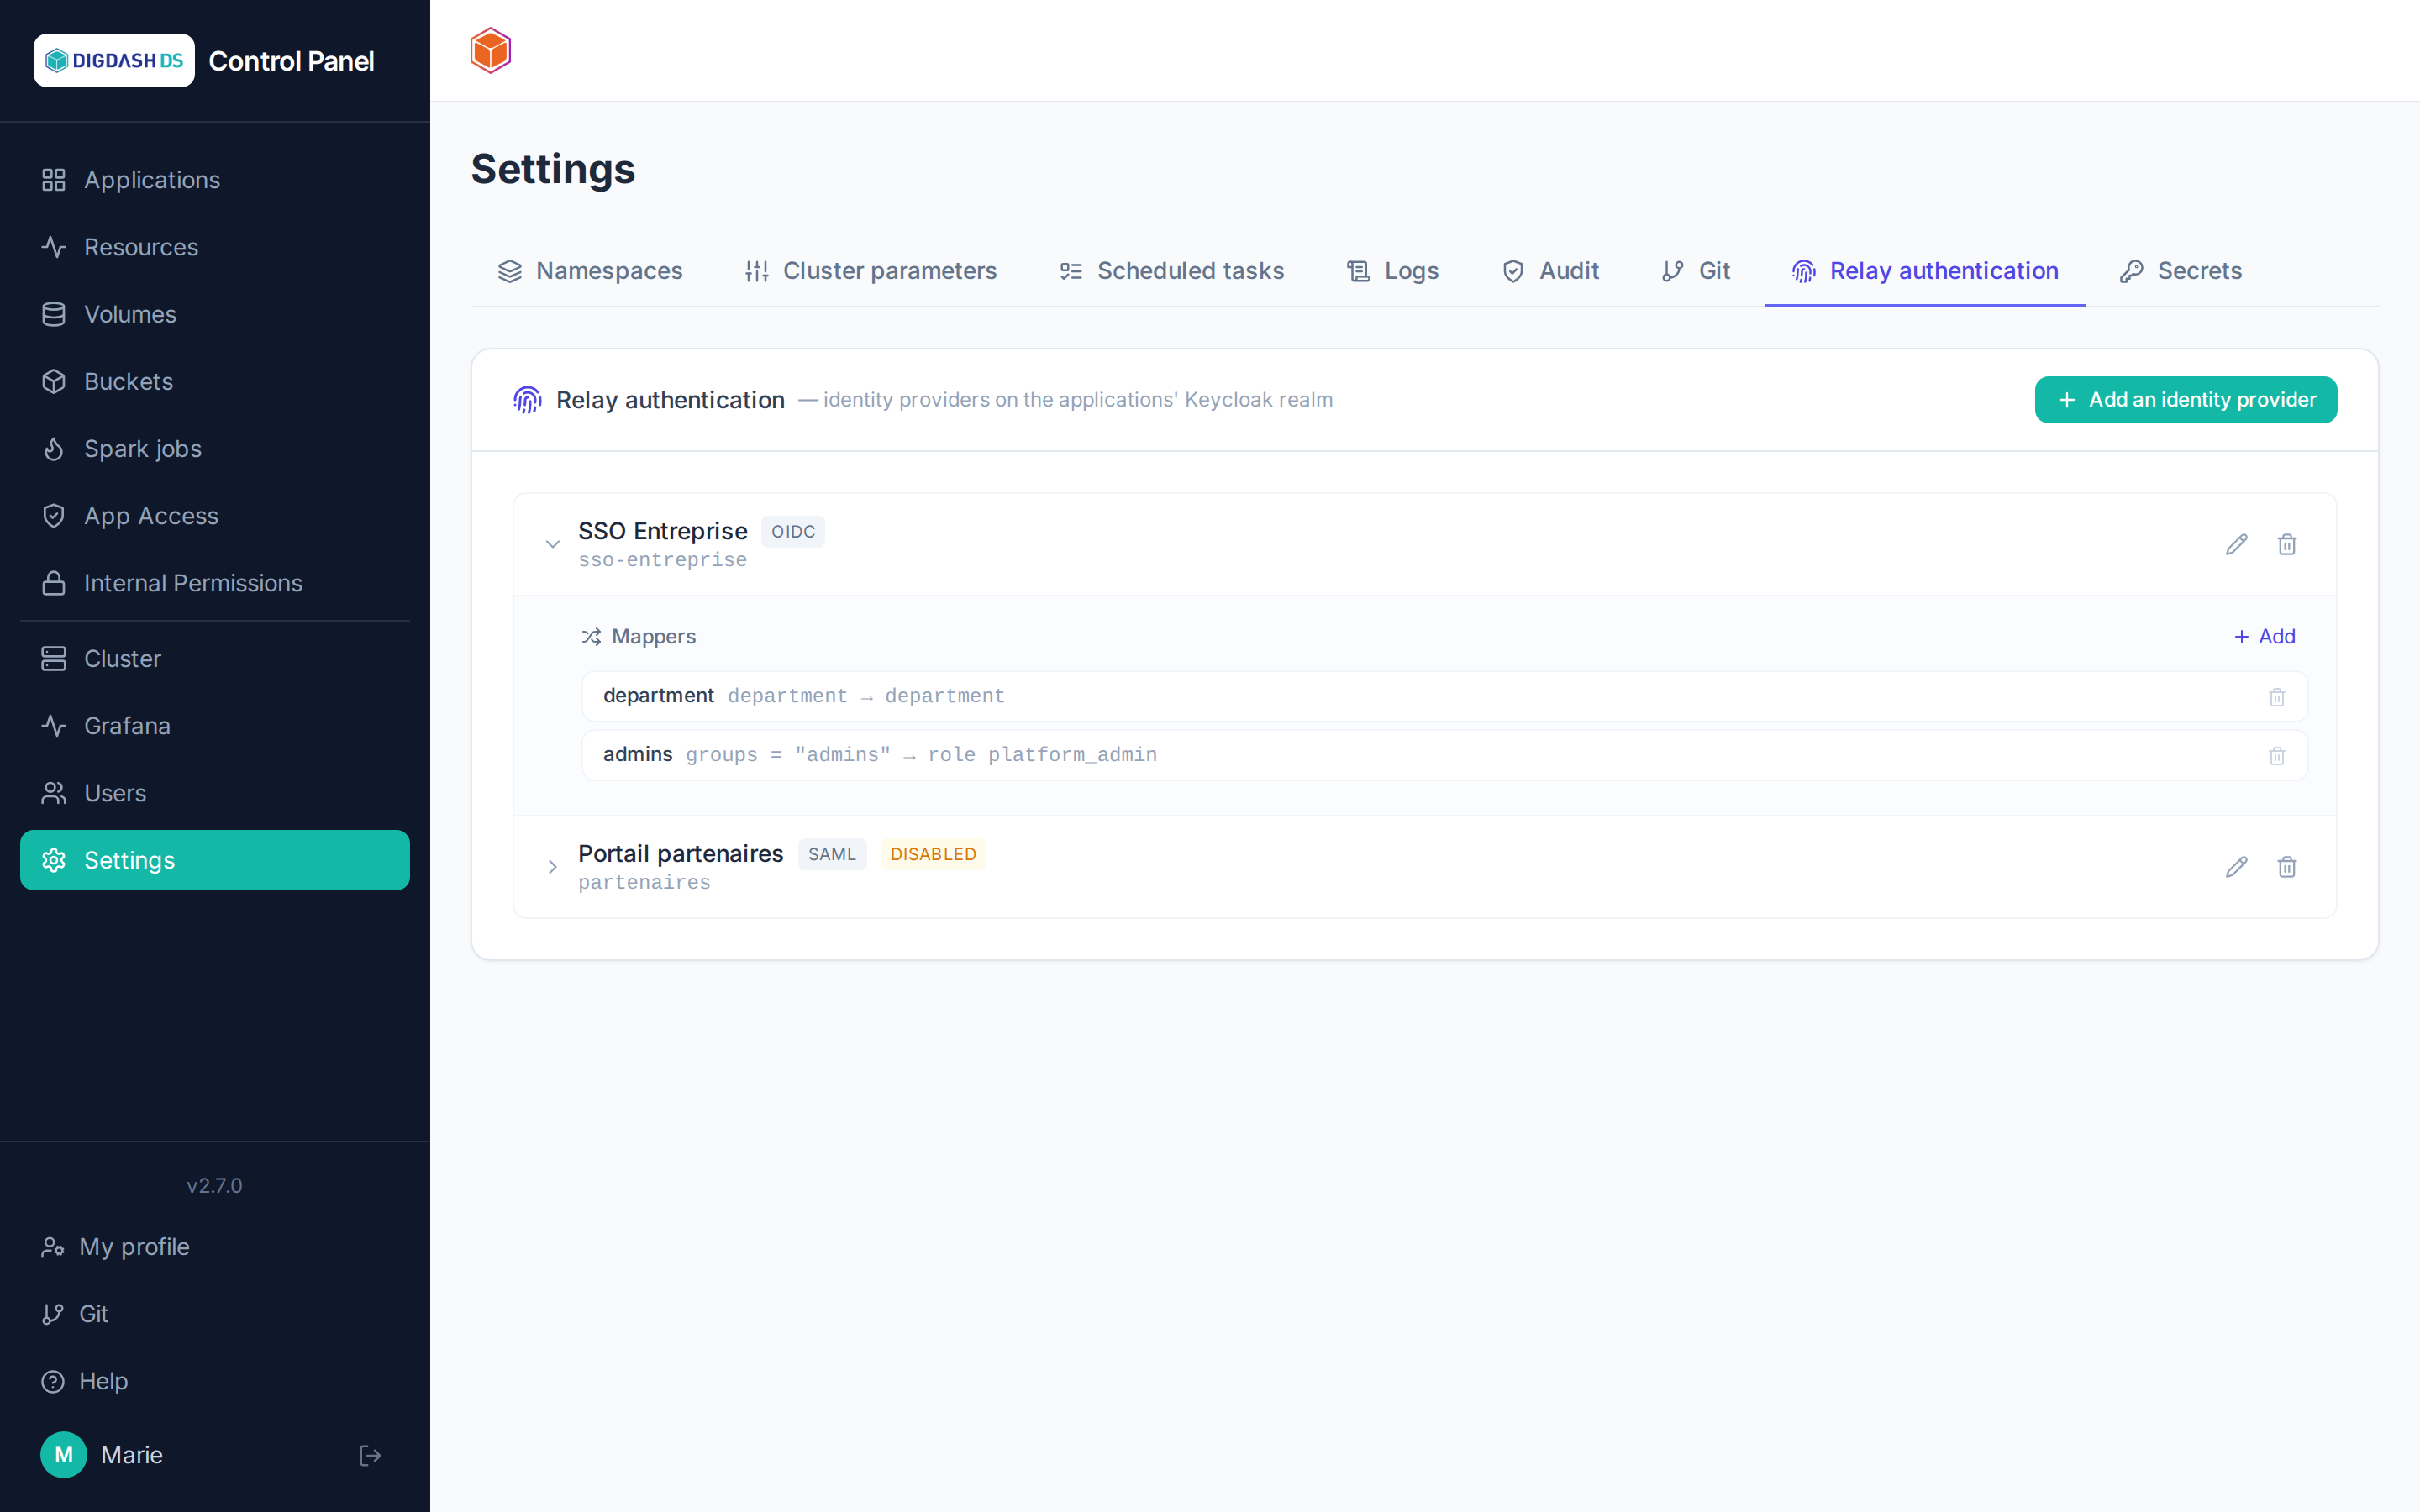
Expanding a provider's row, the Mappers section maps information received from the upstream provider onto the platform:
- Attribute: copies an OIDC claim (or a SAML attribute) to a user account attribute — for example
department→departmentattribute. - Role: grants a realm role when a claim equals a given value — for example
groups = "admins"→platform_adminrole.
On the upstream provider's side
The identity provider's administrator must register the platform as a client and authorize the Keycloak redirect URL (https://<keycloak>/realms/<realm>/broker/<alias>/endpoint), visible in the Keycloak console.
Example: signing in with a Google account
Google exposes a standard OpenID Connect provider — no special configuration is needed on the platform side beyond the flow described above.
1. Create the credentials on Google's side
In the Google Cloud Console (a dedicated or existing project):
- APIs & Services → OAuth consent screen: set it up if not already done (app name, authorized domains).
- APIs & Services → Credentials → Create credentials → OAuth client ID, type Web application.
- Authorized redirect URIs: add
https://<keycloak>/realms/<realm>/broker/google/endpoint(the alias chosen in the next step —googlehere — must match). - Note down the generated Client ID and Client secret.
2. Configure the identity provider on the platform side
From Add an identity provider:
- Alias:
google(must match the redirect URI authorized on Google's side). - Protocol: OpenID Connect.
- Display name: e.g.
Google. - Import from a URL:
https://accounts.google.com/.well-known/openid-configuration, then Import — Google's endpoints (authorization, token, JWKS, userinfo) are filled in automatically. - Client ID / Client secret: the values noted in the previous step.
- Save.
The Google button then appears on the platform's sign-in screen.
Restricting to a Google Workspace domain
To only allow accounts from a Google Workspace organization rather than any Google account, publish the OAuth consent screen internally to the organization (rather than externally) on the Google Cloud Console side — the restriction then happens on Google's side, before the user even reaches the platform.